To understand basement waterproofing methods best suited to poured concrete foundations it is crucial that you understand how this type of foundation is built, as well as its general characteristics.
How a Poured Concrete Foundation is Constructed – Step by Step
The images below show the sequence of steps followed in building a poured concrete foundation; including foundation waterproofing, damp proofing and weeping tile installation.
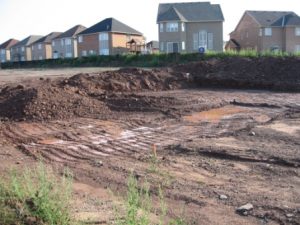
Step 1 – Excavation of the soil
The first step in the construction of any home is excavation; this is because the foundation is, and must be, built first. The remainder of the home will be entirely supported by the foundation.

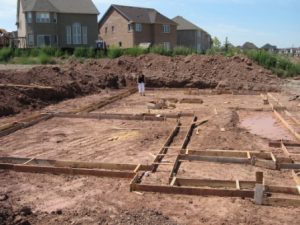
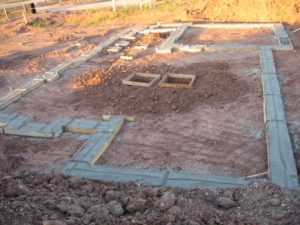
Step 2 – Forming of the footings
In order to erect the foundation on a stable surface, a concrete stratum, called a footing (or footer), needs to be poured. A footing is usually a 16″ wide (twice the foundation width) and 8″ thick slab of poured concrete positioned to support future load bearing foundation walls as well as support posts for inside load bearing walls. In the image below, you can see the wooden forms for the footings that will be poured.
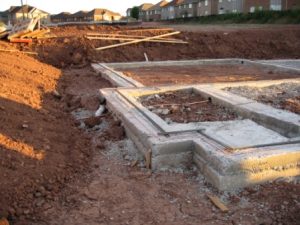
Step 3 – Pouring of the footings
ln this next image we can see the poured footings as well as square shaped wooden forms for footings which will be beneath the future support posts that will be erected in the basement. These support posts will support a steel I-beam which will bear the weight of the center of the house.
If you look closely at the picture below and you will notice that the footing is quite thick; in fact, there are actually two footings, one poured on top of the other. This is not standard construction, two footings were poured because the initial pour was too low, as a result, the foundation would have been too deep for the planned foundation height. An alternative to the pouring of a second footing is the addition of concrete blocks on the top of the poured foundation until the desired height of the foundation is reached.
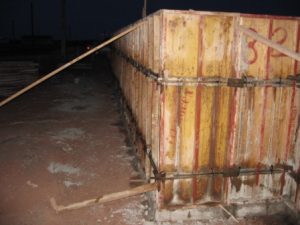
Step 4 – Installation of the forms for the foundation walls
With the footings in place, the forming crews install the forms into which concrete will be pumped. In this particular application, tie-rods are being used; these rods will keep the plywood forms at exactly 8″ apart, which is the standard foundation thickness for foundations across the GTA today.
Step 5 – Disassembly of the forms and placement of weeping tile
When the concrete has cured sufficiently the forms are removed. After removal we can see the vertical seams between the sheets of plywood that were removed. We can also see circular concrete patches used fo fill the holes left behind after the tie-rods are removed. Similar patches are normally visible on the interior of the basement as well. The weeping tile is placed next to the footing all around the perimeter of the foundation.

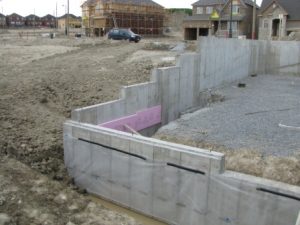
Variations in forming
The following image is typical of how a foundation steps down in order to accommodate a walkout basement.
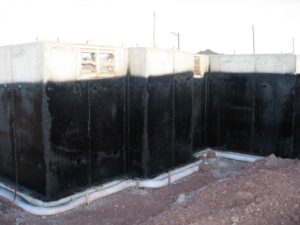
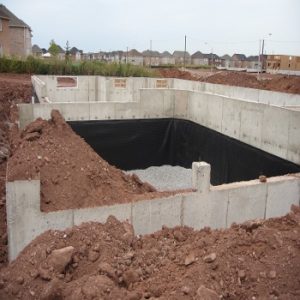
Step 6 – Waterproofing of the foundation
It is standard practice to spray a bituminous coating onto the foundation. This coating serves to dampproof the foundation in order to prevent water absorption by the concrete.
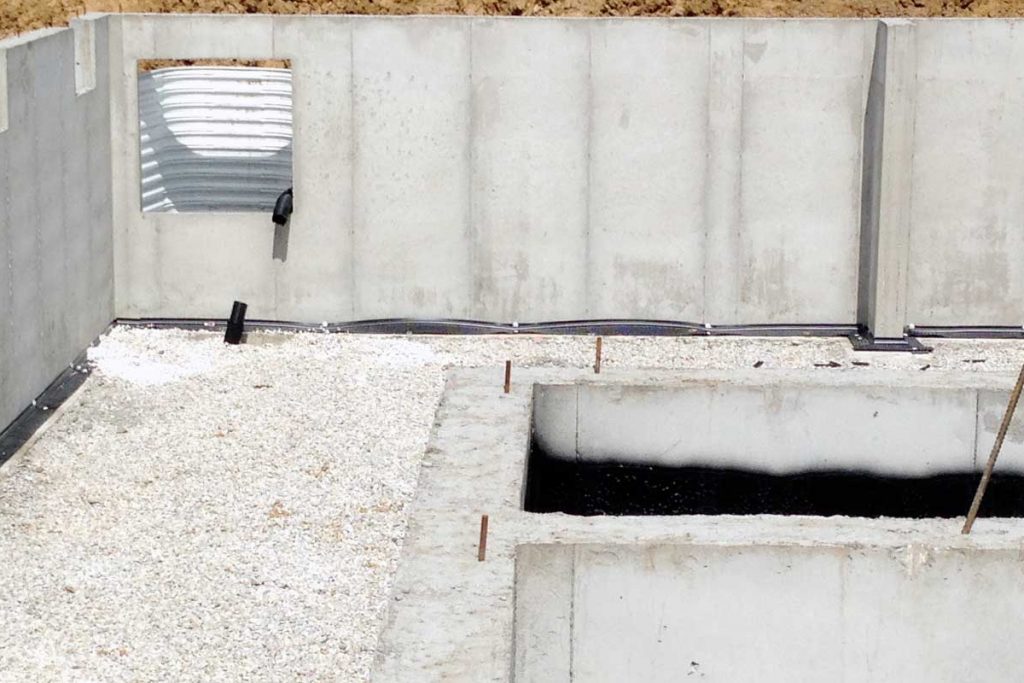
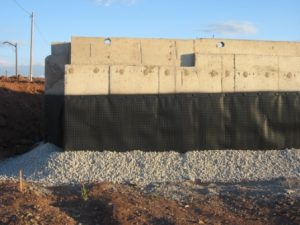
Step 7 – Installation of foundation wrap and gravel
A foundation wrap, also referred to as air-gap membrane, is installed on all exterior foundation walls. Once the membrane is installed the weeping tile is covered by 3/4 clear gravel to enhance drainage around the weeping tile.
Step 8 – Backfilling of soil around the entire foundation
Now that the foundation is waterproofed it is time to backfill around the foundation. It is important to note that this image is centered on the garage which is waterproofed on the inside. This is because those walls are the exterior walls to the inside of the basement.

Step 9 – Pouring of support beam footings
Any load bearing structural member must be secure; like the foundation walls that support the weight of most of the home the metal support posts must also have footings.
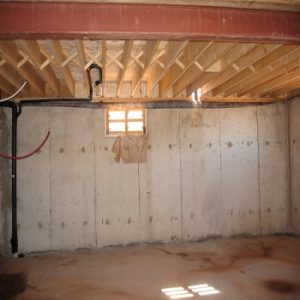
Step 10 – Completion of installation of support structure
With the foundation and support posts in place, the main i-beam can be installed and the remainder of the home can be built.